1. PRODUCT CHARACTERISTICS

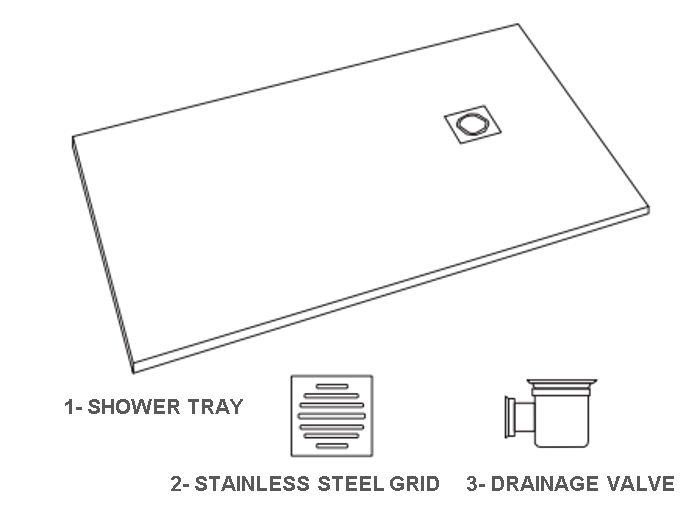
2. PROVIDED ITEMS
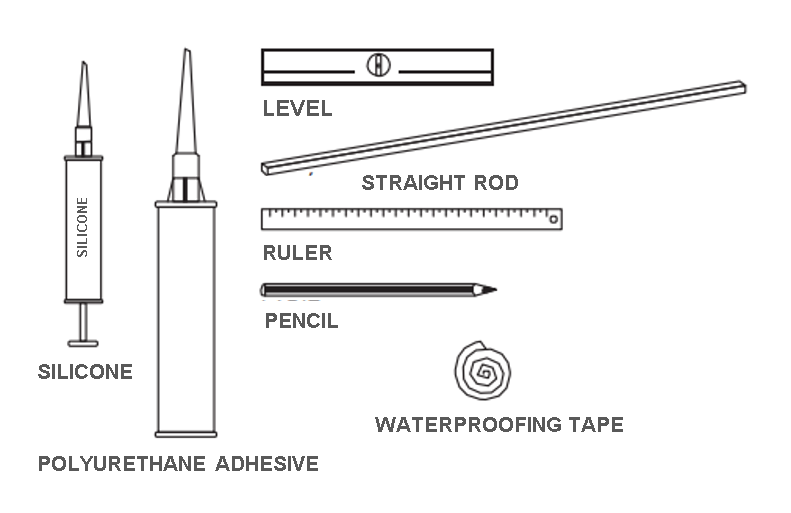
3. NECESSARY TOOLS
4. SHOWER TRAY PRE-INSTALLATION
5. ASPECTS TO TAKE INTO ACCOUNT BEFORE SHOWER TRAY INSTALLATION
Before proceeding to the shower tray installation there are certain aspects to be taken into account:
- The shower tray drains correctly.
- The shower tray maintains its horizontal position and its situated over a levelled surface until the moment of its installation.
- There are no imperfections or anomalies on the shower tray's surface.
Notice: in case that anomalies or imperfections are detected on the shower tray, DO NOT INSTALL the shower tray and proceed to contact the dealer and inform him of the situation.
6. INSTALLATION OPTIONS
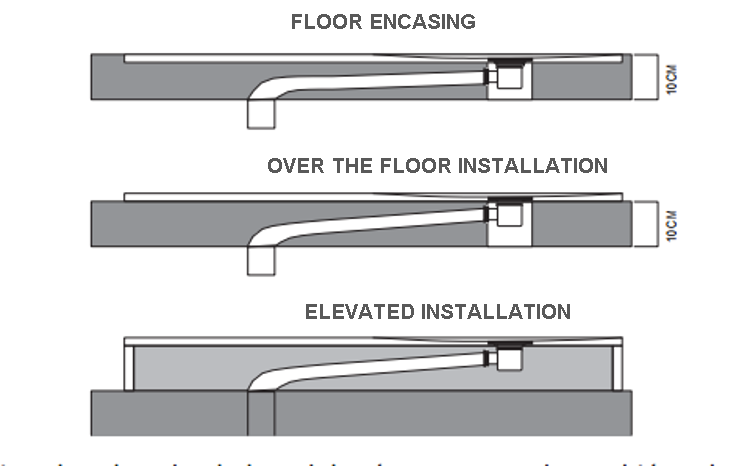
Notice: In the raised installation over the floor, the shower tray must be also placed over a flat and even surface that covers the whole of the shower tray's base.
7. SHOWER TRAY INSTALLATION
7.0 Shower tray preparation
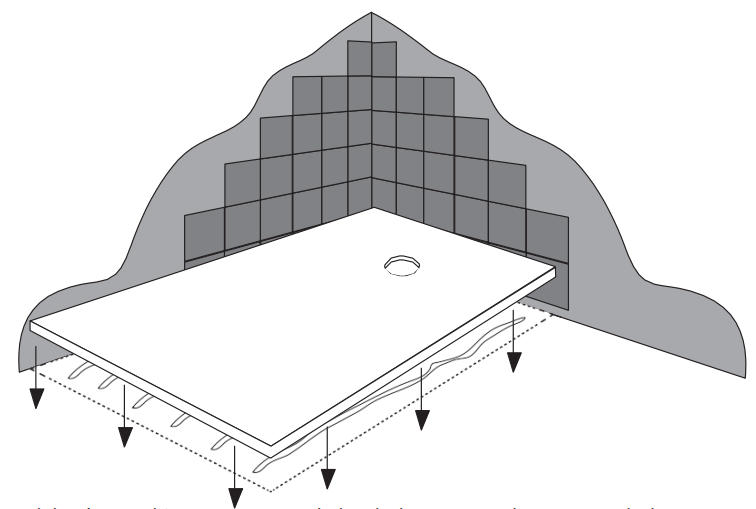
In order of a correct shower tray installation, we must take into account that the base over which the shower tray will be installed must be perfectly flat, levelled and dry, as the filling materials may “pull” the dish and curve it, thus making it totally useless.
- The base must be made of mortar and not exclusively out of sand.
-
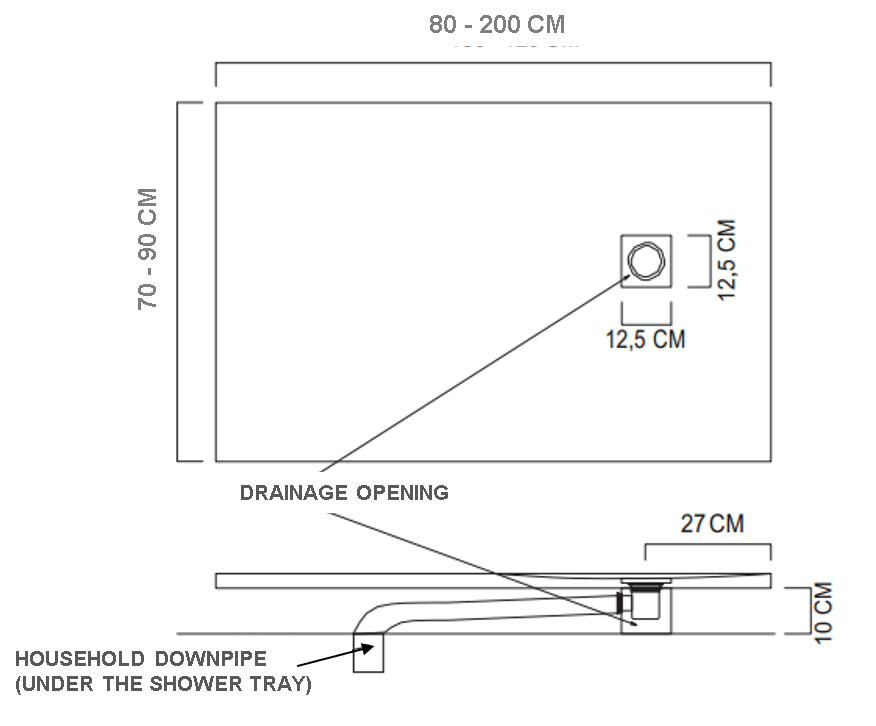
A gap must be left in the base for the drain valve installation, as indicated in the pre-installation paragraph (See pre-installation).
-
A gap or channel must be made so the drain pipes can pass through from the home's downpipe to the shower tray's drain valve.
7.1 Siphon installation
Once the base is ready, we will place the siphon in its final placement and connect it to the drain pipes that connect it to the house's downpipe. It is essential to follow the drain valve installation instructions provided by the manufacturer.
We must make sure that there are no leaks and that the installed elements do not protrude from the cavities made for them, in which case the shower tray would not settle down correctly on its base.
Notice: It is very important that there is a slope from the shower tray drain to the downpipe in order to guarantee the shower tray's drainage.

7.2 Shower tray placement
Unpack the shower tray and use the cardboard to protect the shower tray surface during all the shower tray installation process.
Place waterproofing tape in the angles the outer edges of the shower tray form with the wall tiles in order to guarantee that there are no leaks between shower tray and the wall.
Apply polyurethane adhesive strips (Sikaflex or similar product) over the mortar base to ensure the shower tray’s attachment to it.

Place the shower tray in its place, ensuring the drainage cavity is aligned with the drain valve that we have situated previously on the floor base.
Note: Do not encase the shower tray more than 10mm in the wall cover on both sides. We will thus avoid shower screen placement and adjustment problems.
Adjust shower tray correctly, check it is correctly leveled (in pitch as in tilt) and check that that it drains properly.
Remove protecting cardboard, silicone the perimeter of the shower tray with neutral, not acetic silicone. Clean the surplus silicone.
Finally place the shower drain grid in its place.
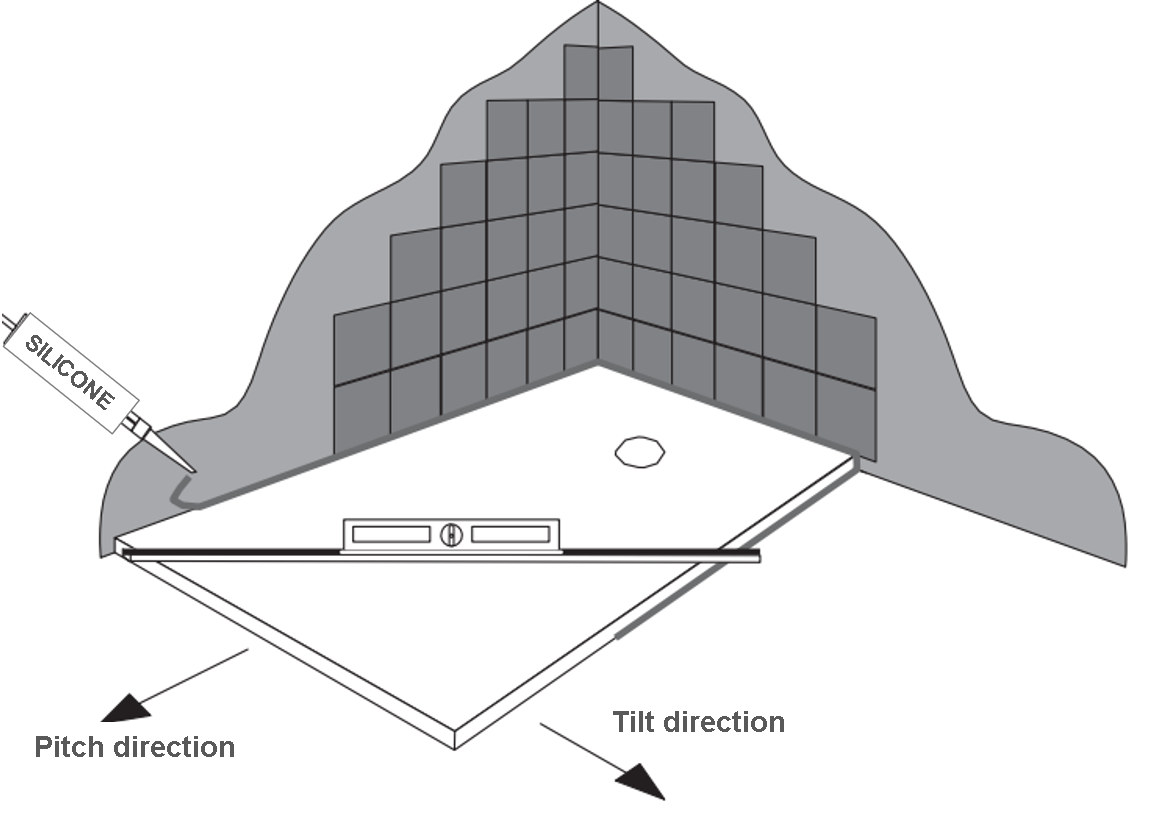
The dish must be well secured and levelled or the shower screen doors will not fit properly and the shower tray performance may be faulty.
We must let the silicone dry for one day before using the shower tray.
Check that the shower tray is correctly installed and drains adequately before proceeding to he tileing of the rest of the bathroom wall, floor and the final installation of the shower screen and other elements.
